Introduction to Homemade Fruit Roll Ups
The nostalgia of fruit roll ups: a childhood favorite revisited
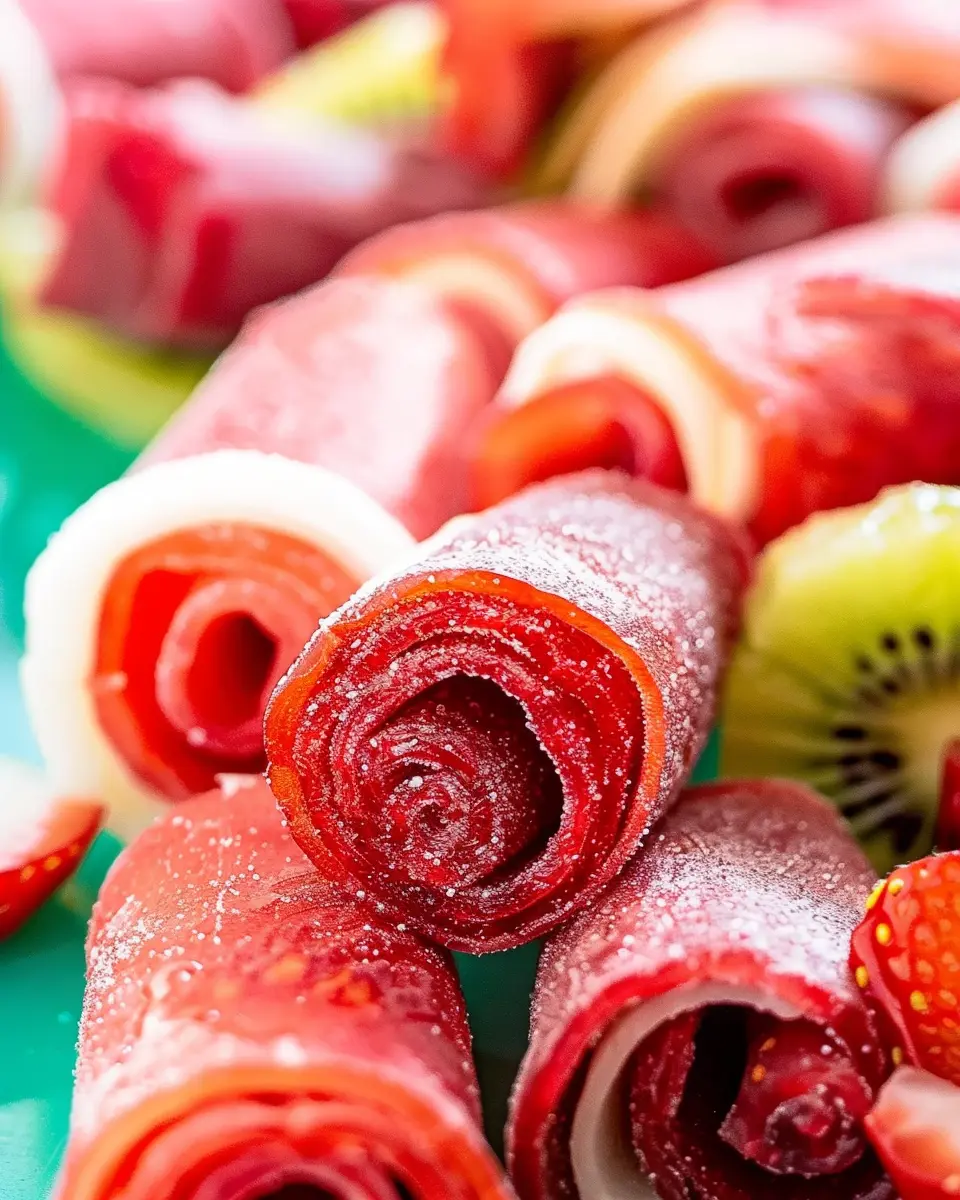
Remember those colorful, chewy snacks that would eagerly await you at lunch? Fruit roll ups were a staple of many childhoods, wrapping up delicious flavors in a fun, portable format. As an adult, it’s hard not to feel a wave of nostalgia when you catch a glimpse of them in the store. Most of us enjoyed their sweetness without a second thought about the ingredients. But as we grow older, we become more conscious of the foods we consume and yearn for healthier, more wholesome options.
The great news? You can easily recreate this beloved snack in your own kitchen! Making homemade fruit roll ups allows you to choose your favorite fruits and avoid unnecessary preservatives or added sugars. It’s not just a project; it’s a delicious trip down memory lane.
Why making fruit roll ups at home is worth the effort
Creating your own fruit roll ups may sound like a daunting task, but I promise it’s simpler than it seems. Plus, the benefits are numerous! Consider these advantages:
- Customization: Whether you prefer strawberries, apples, or mixed berries, you get to choose your base flavors. Want to mix in some tropical flair? Toss in some pineapple or mango!
- Healthier ingredients: Control the sugar content by using fresh, ripe fruits. You can also experiment with adding natural sweeteners like honey or maple syrup if desired.
- Satisfaction of homemade: There’s something incredibly rewarding about taking raw fruits and transforming them into a delightful snack. It’s an engaging activity perfect for a cozy weekend.
Did you know that homemade snacks can save you money in the long run? According to TheDollarStretcher, preparing snacks at home greatly reduces costs compared to buying pre-packaged options. A little prep today means tasty treats tomorrow—perfect for kids and adults alike!
In summary, making homemade fruit roll ups is not only a fantastic way to indulge your sweet tooth but also an opportunity to get creative in the kitchen. So let’s dive into how you can make these delightful snacks right at home!

Ingredients for Homemade Fruit Roll Ups
Creating delicious homemade fruit roll ups is not only satisfying but also a fun culinary adventure. Let’s break down the ingredients you’ll need to get started.
Essential ingredients for homemade fruit roll ups
To make a basic yet delightful batch of homemade fruit roll ups, you’ll need the following:
- Fresh fruit: Choose your favorites like strawberries, mangoes, or apples. Approximately 2 cups of pureed fruit is ideal.
- Sweetener: Depending on your fruit’s natural sweetness, consider adding 1-2 tablespoons of honey or agave syrup.
- Lemon juice: A tablespoon of lemon juice helps to brighten the flavors and adds a bit of tartness.
These ingredients form the foundation of your fruit roll ups, ensuring a vibrant flavor and great texture.
Optional ingredients to customize your flavor
Want to elevate your homemade fruit roll ups? Consider adding:
- Spices: A sprinkle of cinnamon or ginger can add a lovely warmth.
- Vegetable purees: For extra nutrients, sneak in a bit of carrot or sweet potato puree.
- Herbs: Infuse your roll ups with a touch of mint, basil, or lavender for a unique twist.
These optional ingredients allow you to tailor your fruit roll ups to your tastes or seasonal fruits. Experimentation is part of the fun!
For more insights on healthy snacking, check out resources like the USDA’s nutritional guidelines here. Happy rolling!
Step-by-step Preparation for Homemade Fruit Roll Ups
Making your own homemade fruit roll ups is not just a fun kitchen project; it’s a healthy alternative to store-bought snacks that are often loaded with preservatives and sugars. Gather your supplies, roll up your sleeves, and follow this simple guide for delicious fruit leather that will have everyone asking for more!
Prepare your oven and cookie sheet
Before diving into the fruity goodness, it’s essential to preheat your oven. Set it to a low temperature—around 170°F (or 77°C). This low heat is crucial for slowly dehydrating the fruit mixture without cooking it.
While the oven warms up, prepare your cookie sheet. Line it with parchment paper, making sure to smooth out any wrinkles. A non-stick spray can offer extra assurance that your fruit roll ups will peel away easily after baking.
Choosing and processing the fruit
The beauty of homemade fruit roll ups lies in the variety of fruits you can use. Almost any fruit can work, but the best choices are those that are naturally sweet, like:
- Strawberries
- Peaches
- Apples
- Mangoes
To process your fruit, wash it thoroughly, remove any peels or pits as needed, and cut it into small pieces. The smaller the pieces, the easier they’ll be to blend into a smooth puree. Toss your prepared fruit into a blender; you want a consistency similar to a thick smoothie.
For more on optimal fruit selection, you can visit websites like Healthline.
Sweetening to your taste
This is where you can personalize your homemade fruit roll ups. Depending on the ripeness and sweetness of your fruit, you might find you don’t need any additional sugar. However, if you prefer a sweeter roll-up, consider adding a touch of honey, agave syrup, or even a splash of lemon juice to brighten the flavor.
Don’t forget to taste the mixture before it’s baked. Adjust the sweetness to your liking—just remember that it can taste different once baked!
Spreading the mixture evenly
Once satisfied with your puree, it’s time to spread it on your prepared cookie sheet. Use a spatula to pour the mixture onto the parchment paper. Aim for a thickness of about 1/8 inch—thinner than that will dry out too fast, while thicker areas might remain chewy.
Mastering the perfect bake
Now comes the waiting game. Place your cookie sheet in the preheated oven and allow the fruit to dehydrate. The process can take anywhere from 4 to 6 hours, depending on the fruit and thickness. It’s wise to check on it periodically; a good homemade fruit roll up will be dry but still slightly tacky to the touch when it’s done.
Cooling and transferring the fruit leather
After baking, let your fruit leather cool completely on the cookie sheet. Once cooled, gently peel away the parchment paper. You’ll notice that it comes off easily if the mixture was spread and baked correctly.
For easy handling, place your fruit leather on a cutting board and allow it to rest for another 10-15 minutes.
Cutting and storing your fruit roll ups
Now that your homemade fruit roll ups are ready, it’s time to cut them into shapes that suit your fancy! Use kitchen scissors for quick snips or a knife for more uniform strips. Wrap each piece in wax paper or parchment for easy storage.
Store your fruit roll ups in an airtight container at room temperature for up to two weeks, or toss them in the fridge if you want to extend their shelf life.
With these simple steps, you’ll not only have a delicious homemade snack but also a fantastic way to incorporate more fruits into your diet. Enjoy transforming your kitchen into a fruit factory, and dive into the delightful world of homemade fruit roll ups!
Variations on Homemade Fruit Roll Ups
Berry medley roll ups: a blend of flavors
If you’re a berry lover, the berry medley roll ups are a perfect pick! Combine strawberries, blueberries, and raspberries for a delightful treat. Just puree the berries together, add a hint of honey or maple syrup for sweetness, and spread the mixture on your dehydrator tray. Imagine biting into a roll-up bursting with the sweet and tangy flavors of summer! This mixture isn’t just delicious—it’s packed with antioxidants, making it a healthier snack option. Want to explore more berry options? Check out resources like Healthline for the latest on the health benefits of berries.
Tropical twist: mango and pineapple delight
For those dreaming of sun-soaked beaches, try homemade fruit roll ups featuring a tropical twist with mango and pineapple. Blend juicy mangoes and sweet pineapple chunks, then spread them out to dry. This combination creates a chewy, sun-kissed flavor that transports you straight to a tropical vacation! Not only are they delicious, but they are also rich in vitamins A and C, providing a quick dosage of nutrients. Interested in exploring more fruit combinations? Nutrition data can show you just how beneficial tropical fruits can be for your health.
Veggie-infused fruit roll ups for the adventurous eater
Feeling adventurous? Why not mix things up and try veggie-infused fruit roll ups? Blend spinach or carrots with apples or pears for a surprising taste that both kids and adults will enjoy. This clever trick not only adds nutrients but also provides the perfect excuse to sneak in some extra veggies into your diet. These roll-ups are a fun way to experiment with flavors and textures while making nutritious snacking exciting. There’s plenty of inspiration out there! Check out sites like EatingWell for healthy recipes to spark your creativity.
With these imaginative variations on homemade fruit roll ups, snacking can be both delicious and healthy! Whether you’re blending berries, going tropical, or adding in some veggies, the possibilities are endless!
Cooking Tips and Notes for Homemade Fruit Roll Ups
Best fruit choices for flavor and texture
When making homemade fruit roll ups, selecting the right fruits can make all the difference. Opt for fruits that are naturally sweet and have a good balance of acidity, such as:
- Mangoes: Smooth and rich in flavor.
- Strawberries: Their sweetness enhances the overall taste.
- Peaches: Perfectly juicy, they create that delightful chewy texture.
Combining fruits can yield an exciting flavor profile. For example, a mix of strawberries and bananas results in a creamy yet tangy treat.
Common baking pitfalls to avoid
Even seasoned cooks can hit a snag while preparing their homemade fruit roll ups. Here’s what to watch out for:
- Not puréeing thoroughly: Ensure you have a smooth mixture to avoid uneven drying.
- Overheating the oven: Keep it at a low temperature (around 140°F), as high heat will cook rather than dehydrate the fruit.
By following these simple tips, your fruit roll ups will turn out delicious, just like the ones you find at top snack shops! Don’t hesitate to consult this guide for more insights on fruit preparation.

Serving Suggestions for Homemade Fruit Roll Ups
Creative Ways to Enjoy Your Roll Ups as Snacks
Homemade fruit roll ups are not only a delightful treat on their own, but they also lend themselves to some creative serving ideas. Whether you’re at work, hosting friends, or cozying up on the couch, consider these fun ways to enjoy your roll ups:
- Wrap them up: Pair your roll ups with turkey bacon or chicken ham for a sweet-savory experience. Just roll them together for a satisfying bite.
- Mix and match: Slice your fruit roll ups into bite-sized pieces and combine them on a platter with assorted nuts or seeds. This not only adds texture but turns snacking into a mini experience!
- Healthy kids’ snacks: Pack them in lunchboxes for your kids alongside some yogurt or fruit slices for a sugar-conscious treat.
Pairing Suggestions: Dips and Drinks
Elevate your homemade fruit roll ups experience with some thoughtful pairings:
- Dips: Cream cheese spreads or almond butter make a delightful complement. Try whisking in a splash of vanilla extract or honey for extra flavor!
- Drinks: For a refreshing beverage, pair the roll ups with sparkling water infused with fresh fruits or herbal tea served iced. These elevate the enjoyment of your roll ups without adding excess sugar.
With these serving suggestions, you can turn everyday moments into something special! For more tips, check out resources from the USDA on healthy snacking or Healthline’s ideas for fruit-based treats. Your homemade fruit roll ups can be just the start of your culinary creativity!
Time Breakdown for Homemade Fruit Roll Ups
Preparation Time
Making homemade fruit roll ups is a breeze! You’ll need about 15 to 20 minutes for prep work. This includes washing, peeling, and chopping your fruit to get it ready for blending. It’s a perfect opportunity to involve your friends—why not make it a fruit party?
Baking Time
Once you’ve blended your fruit into a smooth puree, it’s time to bake. The drying process typically takes 6 to 8 hours, depending on the thickness of your puree and the humidity in your kitchen. Make sure to check on it occasionally; this is where the magic happens!
Total Time
In total, you’re looking at approximately 6 to 8 hours but don’t worry; most of that time is hands-off. You can easily go about your day while the homemade fruit roll ups are drying. It’s a tasty project that requires minimal active time—your future snacking self will thank you!
For tips on fruit selection, check out this resource on choosing the best fruits for recipes. Remember, the fresher the fruit, the better the flavor!
Nutritional Facts for Homemade Fruit Roll Ups
Caloric Content and Health Benefits
When you whip up your own homemade fruit roll ups, you’re in control of the ingredients. On average, a serving contains about 60 calories, largely depending on the fruit used. These tasty snacks are packed with vitamins like A and C, helping to boost your immune system and support eye health. Opting for organic fruits can maximize these benefits, making your treat both delicious and nutritious. Check out Healthline for more on the benefits of vitamins.
Natural Sugars vs. Added Sugars
One of the best aspects of homemade fruit roll ups is that they predominantly contain natural sugars from the fruit itself. Unlike many store-bought options filled with added sugars, your homemade version ensures that you enjoy a guilt-free treat. It’s a smart choice for anyone looking to cut down on sugar intake while satisfying a sweet tooth. Plus, you can always mix in a bit of honey or maple syrup if you like things a little sweeter. For a deeper dive into sugars, visit Harvard Health.
FAQ about Homemade Fruit Roll Ups
Can I use frozen fruit for my roll ups?
Absolutely! Using frozen fruit is a convenient and budget-friendly option for making homemade fruit roll ups. Just make sure to let the fruit thaw before blending. In fact, frozen fruits like strawberries, mangoes, or blueberries can pack a flavor punch and even retain their nutrients. Aim to use fruits that are high in natural sugars for the best results. For more tips, you might find this article on freezing fruits helpful!
How long do homemade fruit roll ups last?
Once you’ve made your homemade fruit roll ups and let them cool, they can be stored in an airtight container at room temperature for about a week. For longer storage, keep them in the fridge, where they can last up to two weeks, or in the freezer for several months! Just be sure to separate sheets with parchment paper if you stack them, so they don’t stick together.
What are some creative flavor combinations?
The world of flavor combinations is truly your oyster! Here are a few unique ideas you might want to try:
- Mango and Coconut: Tropical bliss!
- Strawberry and Basil: A refreshing twist.
- Peach and Ginger: Sweet with a zing.
- Mixed Berry and Banana: A crowd-pleaser that never gets old.
Experimenting with spices or herbs can elevate your homemade fruit roll ups to gourmet levels! Don’t hesitate to mix and match your favorite fruits or add a splash of lemon juice for an extra zing. Who knows, you might just create the next hit flavor!
Conclusion on Homemade Fruit Roll Ups
Celebrating the joy of homemade snacks
Creating your own homemade fruit roll ups is not just about snacking; it’s a celebration of creativity and health. The vibrant colors and aromas of fresh fruit transform into a delightful treat that you can enjoy guilt-free. Plus, you control the ingredients, ensuring they’re tasty and nourishing. Nothing beats the satisfaction of biting into something made with love!
Encouragement to experiment and enjoy the process
Don’t hesitate to try different fruits or even blend in spices for a unique flavor twist. The fun lies in experimenting—make it a delightful weekend project with friends or family. As you blend, pour, and dry, savor each moment. After all, homemade snacks are as much about the journey as they are about the final product. If you’re curious about alternative fruit snack ideas, check out resources like Healthline for more inspiration!
PrintHomemade Fruit Roll Ups: Easy and Delicious Snack for Everyone

Enjoy the delightful taste of homemade fruit roll-ups, a healthy and fun snack for everyone.
- Prep Time: 15 minutes
- Cook Time: 6 hours
- Total Time: 6 hours 15 minutes
- Yield: 10 servings
- Category: Snack
- Method: Baking
- Cuisine: American
- Diet: Vegan
Ingredients
- 2 cups fresh fruit of your choice
- 1 tablespoon honey or sweetener
- 1 tablespoon lemon juice
Instructions
- Preheat the oven to 170°F (75°C).
- Blend the fruit, honey, and lemon juice until smooth.
- Spread the mixture evenly on a baking sheet lined with parchment paper.
- Bake for about 6-8 hours, or until set.
- Cool completely before cutting into strips.
Notes
- Experiment with different fruit combinations for unique flavors.
- Store in an airtight container for up to one week.
Nutrition
- Serving Size: 1 roll
- Calories: 50
- Sugar: 10g
- Sodium: 1mg
- Fat: 0g
- Saturated Fat: 0g
- Unsaturated Fat: 0g
- Trans Fat: 0g
- Carbohydrates: 13g
- Fiber: 1g
- Protein: 0g
- Cholesterol: 0mg