Introduction to Dirt Cake Recipe
If you’ve ever been to a potluck or a casual gathering, chances are you’ve encountered the delightful dirt cake. This no-bake dessert, which looks like something you’d dig up from the garden, is a whimsical combination of chocolate pudding, cream cheese, and crumbled chocolate cookies. It’s especially popular among young professionals, and for good reasons!
What is Dirt Cake?
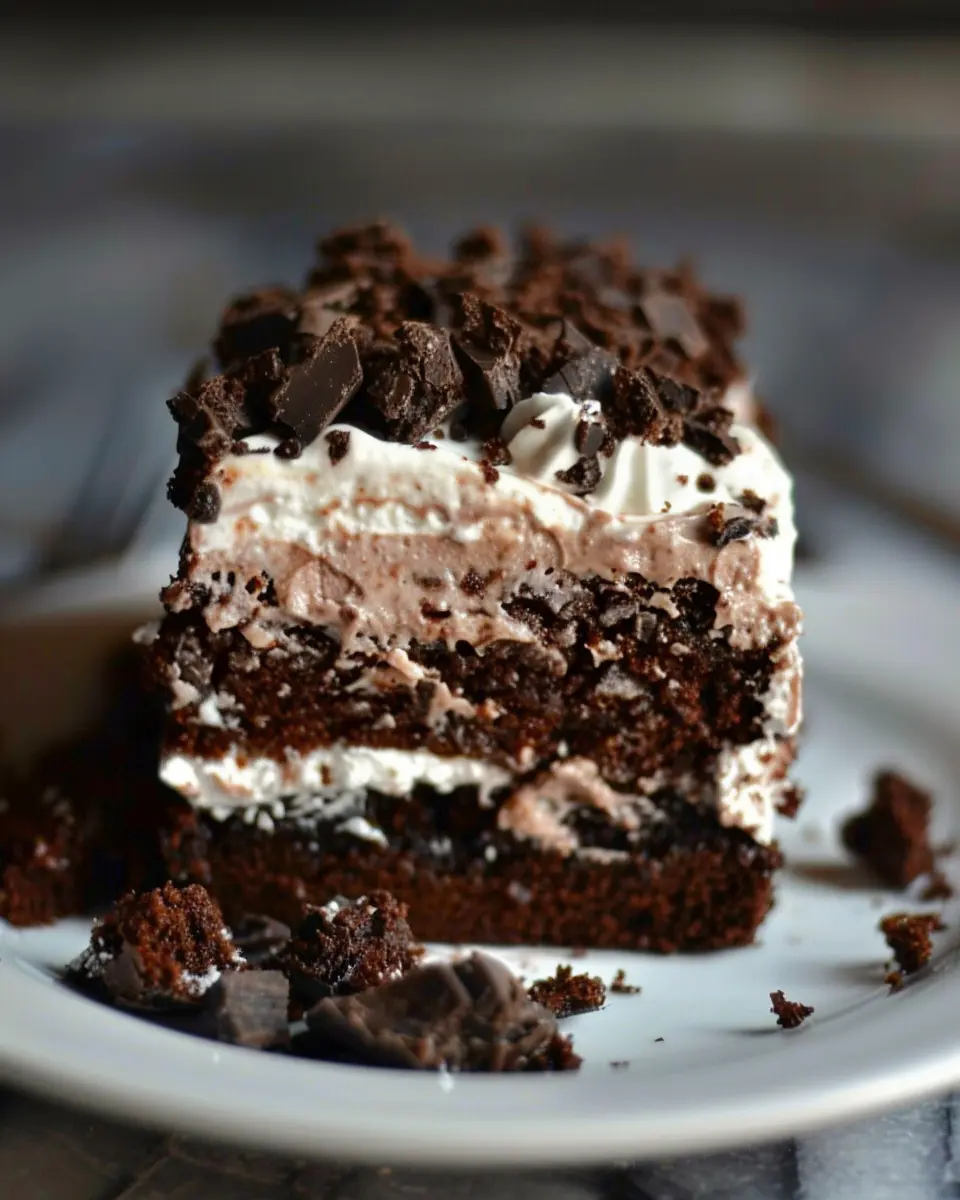
Dirt cake is a fun, visually appealing dessert that mimics the look of soil, often garnished with gummy worms or fresh mint leaves to add a playful touch. It usually consists of layers of chocolate pudding, Cool Whip, and crushed Oreos or similar cookies, creating a rich, creamy texture with delightful crunch. But it’s not just about aesthetics! This dessert packs a nostalgic punch, reminding many of childhood birthday parties and family gatherings.
Why is It Popular Among Young Professionals?
Young professionals often lead busy lives, juggling work commitments, social outings, and other responsibilities. This makes the appeal of a quick, no-bake dessert irresistible. Here are a few reasons why the dirt cake recipe resonates with this age group:
-
Simplicity: With minimal ingredients and straightforward instructions, it caters to both novice and experienced cooks. You can whip it up in no time!
-
Customization: Feel like adding some Turkey Bacon bits or a sprinkle of nuts? Go for it! The flexibility allows for creativity, making each dirt cake your own.
-
Social Appeal: The quirky presentation is a great conversation starter. It’s perfect for any gathering or barbecue, providing a light-hearted touch to any table.
-
Taste of Nostalgia: Many young professionals have fond memories of enjoying this dessert in their youth. It connects them to simpler times, making it a comfort food in modern life.
This dessert is more than just a treat; it’s a sweet escape from the daily grind. Plus, whipping up a dirt cake can be a fun activity with friends or family! For more detailed insights and creative variations, you can check out resources like Food Network or Serious Eats for inspiration.
So if you’re looking for a dessert that’s as easy to make as it is fun to eat, the dirt cake might just be your new go-to!
Ingredients for Dirt Cake
Essential ingredients for a delicious dirt cake
When it comes to crafting a delightful dirt cake recipe that will allure anyone, the essentials are key. Here’s what you’ll need to whip up this nostalgic favorite:
- Chocolate sandwich cookies: Around 20-25 of these guys, to create that signature “dirt” look.
- Cream cheese: About 8 oz, softened—this provides a rich, creamy base.
- Butter: ½ cup, also softened, for that smoothness.
- Powdered sugar: 2 cups, to sweeten things up perfectly.
- Vanilla extract: 1 tsp, to add aroma and flavor.
- Whipped topping: 8 oz, for a light and fluffy finish.
Gather these ingredients, and you’ll be off to a delicious start!
Optional add-ins for extra flavor
Once you’ve tackled the essentials, consider these fun add-ins to elevate your dirt cake recipe even further:
- Creamy peanut butter: ½ cup, for those who crave a nutty twist.
- Mini chocolate chips: Perfect for added texture throughout the layers.
- Gummy worms: A playful touch that kids (and adults) love!
- Fresh berries: Such as raspberries or strawberries, offer a pop of color and freshness.
With these options in mind, you can customize your dirt cake to reflect your style or to bring a unique flavor twist—not to mention, impress your friends along the way! For more ideas, check out some fantastic tips on Chocolate Dessert Recipes.
Preparing the Dirt Cake
Creating a delicious dirt cake is not just about mixing ingredients; it’s an exciting journey that ends in a delightful dessert! This no-bake masterpiece is perfect for parties, potlucks, or simply indulging yourself. Let’s roll up our sleeves and dig into this fun process!
Gather Your Ingredients
Before you get started, a little prep goes a long way. Gather all the ingredients you’ll need to create your dirt cake. Here’s a handy list:
- Chocolate cake mix (along with eggs, water, and oil as per the package instructions)
- Instant chocolate pudding mix
- Milk (preferably whole for richness)
- Cream cheese (softened)
- Powdered sugar
- Whipped topping (like Cool Whip)
- Hot fudge sauce (for that ooey-gooey layer)
- Crushed chocolate sandwich cookies
- Gummy worms for decoration (optional, but adorable)
Having everything in one place will save you time and keep the process smooth!
Bake the Chocolate Cake
Next, it’s time to whip that cake into shape. Preheat your oven according to the instructions on your cake mix. Mix together the cake ingredients in a large bowl—trust me, the fragrant aroma of a freshly baked chocolate cake is an experience worth savoring. Once it’s ready, pour the batter into a greased baking dish and bake until a toothpick inserted into the center comes out clean.
Let the cake cool completely before moving on to the next step. In the meantime, you can find helpful baking tips from sources like Food Network to ensure your cake turns out perfectly.
Create the Hot Fudge Layer
While your cake is cooling, let’s get that luscious hot fudge layer ready! Pour your hot fudge sauce into a small microwave-safe bowl and warm it in the microwave for about 30 seconds, just until it’s pourable but not boiling. This layer adds an extra dimension of flavor and richness to your dirt cake recipe.
Prepare the Pudding Layer
Now for the magic moment! In another bowl, whisk together the instant chocolate pudding mix and milk (use about two cups for a thicker layer). Allow the pudding to sit for a few minutes until it thickens—this also gives you a moment to contemplate how delicious this dessert will be! For tips on making the perfect pudding, you can check out Allrecipes, which has a plethora of dessert recipes to inspire your inner chef.
Assemble the Dirt Cake with Layers
Time to build your masterpiece! Start by crumbling half of your cooled chocolate cake into the bottom of a large glass dish. This creates a soft and moist base. Next, layer the hot fudge over the crumbled cake, followed by dollops of the pudding mixture.
- Repeat the layers: Add another layer of crumbled cake, then the remaining hot fudge, and finally the pudding.
Top it all off with some crushed chocolate sandwich cookies—this is where the “dirt” effect comes into play! You can even sprinkle some gummy worms for a fun twist.
Chill and Serve
After assembling your dirt cake, it’s crucial to let it chill in the refrigerator for at least 4 hours (overnight is preferable) to allow all the flavors to meld beautifully. When you’re ready to serve, scoop it out into bowls and enjoy that decadent, layered goodness.
This dirt cake recipe is not just a feast for the eyes; it’s guaranteed to bring smiles to everyone who indulges. So, what are you waiting for? Dive into this delightful dessert and let me know how it turns out! Happy baking!
Variations on Dirt Cake
Dirt cake is such a versatile dessert that allows for a ton of creative expression in the kitchen. Whether you’re catering to different dietary preferences or just looking to mix things up, there are plenty of variations on the classic dirt cake recipe that will keep your taste buds excited.
Classic Oreo Dirt Cake Twist
The original dirt cake recipe typically features Oreo cookies, but why not enhance it with a twist? Consider layering in chocolate pudding and cream cheese frosting alongside crushed Oreos for a rich, dessert experience. You can also add a pinch of sea salt to balance the sweetness—trust me, it’s a game-changer! Another fun idea is to top your dirt cake with gummy worms; they add a playful touch that’s perfect for kids and adults alike.
Vegan-Friendly Dirt Cake Options
If you or your guests are looking for a vegan-friendly dessert, you can absolutely whip up a delicious dirt cake without the dairy. You’ll need to substitute traditional pudding with a plant-based version—this one from The Kitchn offers an excellent recipe. Use coconut cream instead of whipped topping and swap Oreos for vegan cookies. With just a couple of tweaks, you’ll have a rich, creamy dessert that everyone can enjoy!
Using Different Cookies for Unique Flavors
Why stick to Oreos when there are so many cookie varieties out there? Try using chocolate chip cookies for a more classic taste or ginger snaps for a little zing. Even animal crackers can add a nostalgic touch. The key is to choose cookies that complement your pudding flavor—think about your favorites and have fun experimenting!
By playing around with these variations, you can personalize this delightful dessert to suit any gathering, ensuring that your dirt cake always stands out. Happy baking!
Baking notes for Dirt Cake
Tips for achieving the perfect cake texture
To master your dirt cake recipe, start with quality ingredients. Use fresh cream and high-quality pudding mix for that luscious texture. Be mindful of your mixing technique—don’t overmix the pudding. Just blend it until smooth for a light, airy finish. A secret tip? Allow your cake to chill in the refrigerator for a few hours or even overnight. This will help the flavors meld and give your dirt cake that delectable texture everyone loves.
Common mistakes to avoid when making dirt cake
One common mistake is forgetting to crush the chocolate cookies to the right consistency. Aim for a mix of fine crumbs and slightly larger pieces for an authentic “dirt” look. Avoid using warm ingredients—the pudding and cream should be chilled before mixing, as warmth can make the cake heavy. Lastly, don’t rush the layering process. Give each layer time to set, ensuring that beautiful presentation when you serve up this whimsical dessert. For further inspiration, check out resources like the Food Network for variations on this fun treat!
Serving suggestions for Dirt Cake
Creative presentation ideas
When it comes to serving your dirt cake, presentation can take it to the next level of fun! Consider using clear cups or mason jars to showcase the layers of creamy filling and crushed cookies. Top it off with gummy worms or edible flowers for a whimsical touch that makes it a hit for both kids and adults. You can even create a “dirt patch” effect by spilling some crushed cookies over the sides. For a more sophisticated take, serve slices on chic dessert plates with fresh mint sprigs or a dusting of cocoa powder. Presentation is key—remember that we eat with our eyes first!
Pairing dirt cake with other desserts
Why not turn your dirt cake recipe into a dessert buffet? Pair it with other sweet offerings like mini cheesecakes, fresh fruit tarts, or chocolate mousse. The contrast of textures and flavors creates an indulgent experience. For a refreshing finish, serve with a light sorbet or gelato to balance the richness of the cake. It’s all about variety and fun!
For those seeking more creative ideas, you might find inspiration from Food Network or Taste of Home, which regularly features dessert pairings and presentation guides.
Tips for Making Perfect Dirt Cake
Creating that dreamy dirt cake you’ve always wanted isn’t just about mixing ingredients; it’s about mastering a few key techniques and knowing how to keep that delicious dessert fresh for when you’re ready to indulge. Let’s dig in!
Key Techniques for Layering
The secret to a show-stopping dirt cake recipe lies in the layering. Start by properly preparing your pudding—make sure it’s thick enough to hold its shape but not so thick that it’s hard to spread. In a clear glass container, alternate layers of crushed chocolate cookies and pudding, aiming for at least three distinct layers. Mixing in some whipped topping into your pudding can create a delightful creaminess that pairs perfectly with the crunchy cookie layers. Don’t forget to reserve a bit of crushed cookie for the top; it mimics dirt and adds that signature look!
How to Store and Keep Your Dirt Cake Fresh
Proper storage of your dirt cake is crucial for maintaining its deliciousness. Cover it tightly with plastic wrap or transfer it to an airtight container to prevent it from drying out. You can keep it in the fridge for up to a week (though it’s usually gone much quicker). If you’re planning to make it ahead of time, consider assembling the layers without the whipped topping. Add it right before serving to keep that light, fluffy texture! For more storage tips, check out this handy guide on keeping desserts fresh from The Spruce Eats.
By following these tips, you’ll be well on your way to impressing friends and family with a perfect dirt cake every time. Happy baking!
Time details for Dirt Cake
When diving into this delightful dirt cake recipe, understanding the time commitment can help you plan your baking adventure. Here’s a quick breakdown:
Preparation time
Getting your ingredients ready and mixing them takes about 20 minutes. This includes crushing the cookies, mixing the pudding, and blending in the creamy goodness.
Baking time
Though you won’t actually be baking this dessert, if you’re using any optional baked elements or crusts, allocate a brief 10-15 minutes.
Chill time
One of the best parts about this dirt cake is the chill time. Allow your cake to rest in the fridge for at least 4 hours, or ideally overnight, to let those flavors meld together beautifully.
Total time
So, all in all, you’re looking at roughly 4 hours and 20 minutes to whip this up from start to finish. It deserves the time for the incredible taste it delivers!
For tips on how to elevate your dirt cake recipe, check out Sally’s Baking Addiction or AllRecipes for a trove of inspiration. Happy baking!
Nutritional information for Dirt Cake
Calories per serving
If you’re indulging in this delightful dirt cake recipe, you might be curious about the calorie count. On average, there are around 250 calories in a typical serving. This makes it an enjoyable treat without completely derailing your diet.
Breakdown of key nutrients
Let’s explore some key nutrients in this dessert:
- Fat: Approximately 11 grams, primarily from cream cheese and whipped topping, offering a rich flavor.
- Carbohydrates: About 30 grams, largely derived from the cookies and sugar, providing a quick energy boost.
- Protein: Roughly 3 grams, mainly from the cream cheese and other mix-ins, contributing to overall satiety.
- Sugars: Approximately 15 grams, adding that sweet touch we all crave.
These figures can vary based on portion sizes and specific ingredient brands. For more detailed nutritional insights, you might want to explore resources like the USDA FoodData Central. Keeping these values in mind can help you enjoy your dirt cake guilt-free!
FAQs about Dirt Cake
Can I make dirt cake ahead of time?
Absolutely! In fact, making your dirt cake a day ahead can enhance the flavors as they meld together, making for a truly delightful dessert. Simply prepare the layers, assemble the cake in your serving dish, and keep it covered in the fridge. This works perfectly if you’re planning a get-together or potluck. Just make sure to add any topping like gummy worms right before serving to keep them fresh and appealing.
What are clever ways to personalize my dirt cake?
There are tons of creative routes you can take with your dirt cake recipe. Consider:
- Gummy Creatures: Instead of just worms, you can add edible insects or other fun gummy shapes to appeal to kids.
- Layered Variations: Add a layer of crushed strawberries or blueberries for a fruity twist.
- Themed Decor: For a Halloween party, fill your dirt cake with spooky decorations like plastic spiders or edible glitter to give it a festive flair.
These personal touches make the dessert even more enjoyable and engaging for your guests.
Are there any gluten-free options for dirt cake?
Yes! You can easily adapt your dirt cake recipe for gluten-free diets. Look for gluten-free chocolate cookies for the crumbled topping. This simple swap allows everyone to enjoy this fun dessert without dietary worries. Just be sure to check the labels, as some brands may contain hidden gluten. For more tips on gluten-free baking, consider exploring resources like Gluten Free Living.
With these FAQs, you’re now equipped to whip up the perfect dirt cake that will leave a lasting impression at any event!
Conclusion on Dirt Cake Recipe
Why Dirt Cake is the Perfect Treat for Young Professionals and Home Chefs
As young professionals, balancing work and culinary adventures can be tricky. That’s where this dirt cake recipe shines! It’s not just a delightful sweet; it’s a nostalgic treat that invites creativity. With minimal ingredients and easy steps, you can whip up a dessert that impresses friends and colleagues alike.
Imagine bringing this whimsical dessert to a potluck or even serving it at a casual dinner party—it’s sure to spark conversations and smiles! Plus, it’s highly customizable. Whether you prefer classic chocolate or want to try festive flavors, dirt cake is your canvas. Dive into your next culinary adventure, and don’t forget to share your creations—after all, food is meant to be enjoyed together!
For more dessert ideas, check out Food52 or Taste of Home for inspiration.
PrintDirt Cake Recipe: Easy Indulgence for Your Next Sweet Treat
This Dirt Cake Recipe is a simple and delicious dessert that will delight kids and adults alike.
- Prep Time: 30 minutes
- Cook Time: 0 minutes
- Total Time: 2 hours 30 minutes
- Yield: 8 servings
- Category: Desserts
- Method: No-bake
- Cuisine: American
- Diet: Vegetarian
Ingredients
- 1 package Oreo cookies
- 8 ounces cream cheese
- 1 cup powdered sugar
- 1/2 cup butter, softened
- 2 cups whipped topping
- 2 cups milk
- 1 large instant chocolate pudding mix
Instructions
- Crush the Oreo cookies in a food processor or by placing them in a zip-top bag and crushing them with a rolling pin.
- In a mixing bowl, combine the cream cheese, powdered sugar, and softened butter. Mix until smooth and creamy.
- Fold in the whipped topping.
- In another bowl, whisk together the milk and instant chocolate pudding mix until it thickens.
- Layer the crushed Oreo cookies and the cream cheese mixture in a serving dish.
- Pour the pudding mixture over the top and finish with more crushed Oreos for garnish.
- Chill in the refrigerator for at least 2 hours before serving.
Notes
- For an extra touch, add gummy worms on top for a fun presentation.
- This recipe can also be made in individual cups for a hand-held version.
Nutrition
- Serving Size: 1 serving
- Calories: 350
- Sugar: 25g
- Sodium: 200mg
- Fat: 20g
- Saturated Fat: 10g
- Unsaturated Fat: 8g
- Trans Fat: 0g
- Carbohydrates: 40g
- Fiber: 2g
- Protein: 4g
- Cholesterol: 30mg