Introduction to Danish Carnival Buns
When we think of delicious pastries, Danish treats often come to mind, but few can rival the charm of Danish Carnival Buns. These sweet delights, known as “Fastelavnsboller” in their native land, are traditionally enjoyed during the festive season of Fastelavn, a celebration that heralds the start of Lent. But what makes these buns so special? Let’s dive into their delightful history!
The Delightful History of Danish Carnival Buns
The origin of Danish Carnival Buns can be traced back to ancient times when the people of Denmark would partake in various feasts before the solemnity of Lent set in. This celebrated occasion often involved wearing masks, singing songs, and of course, indulging in scrumptious pastries. The tradition of baking these buns was rooted in both practicality and celebration. They were a way to use up rich ingredients like cream and sugar, which were often limited during the fasting period.
Interestingly, these buns didn’t always have the sweet fillings we enjoy today. Initially, they often contained simple mixtures of sponge cake or bread dough. However, as culinary creativity blossomed, bakers began experimenting with fillings, transforming the humble bun into a culinary masterpiece. Today, you can find Danish Carnival Buns filled with a variety of delicious ingredients, from vanilla creams to fruity preserves, each adding a unique twist to the classic recipe.
With the rise of Danish pastry recognition in the 19th century, Danish Carnival Buns traveled beyond Denmark’s borders. They made their way to bakeries worldwide, captivating both locals and tourists. As you enjoy these tasty buns filled with rich cheesecake flavor in our recipe, think about the generations of creativity and joy behind each bite.
In Denmark, Fastelavn is more than just a day for treats; it’s a symbol of community and celebration. Families gather to bake and share these treats, promoting a sense of togetherness. So, whether you’re preparing them for festivities or simply a cozy weekend indulgence, Danish Carnival Buns carry a story, a delicious history, and an invitation to savor life’s sweet moments.
Ready to try your hand at making these delightful pastries? Let’s get baking!
Ingredients for Danish Carnival Buns
Creating the perfect Danish Carnival Buns is all about selecting the right ingredients. Here’s what you’ll need to get started on this delicious journey:
Essentials for crafting the perfect buns
- All-Purpose Flour: About 4 cups will give you the ideal base for fluffy buns. Look for high-quality flour to ensure a tender crumb.
- Sugar: You’ll need around ½ cup to add just the right amount of sweetness to your dough.
- Yeast: One packet (2¼ teaspoons) of active dry yeast will help your buns rise beautifully.
- Milk: Approximately 1 cup of warm milk activates the yeast and adds richness to the flavor.
- Butter: Using about ½ cup of softened butter will enrich the dough, making it wonderfully tender.
- Eggs: Incorporate 2 large eggs for a rich taste and an appealing golden hue.
- Salt: Just a teaspoon balances the sweetness and enhances flavor.
Now that you’re equipped with these essentials, you can explore further tips on making Danish Carnival Buns delightful. For guidance on selecting quality ingredients, check out this article from the Culinary Institute. Happy baking!
Step-by-Step Preparation of Danish Carnival Buns
Danish Carnival Buns are not just delightful pastries; they’re a labor of love that brings together friends and family for a tasty treat. In this section, we’ll take you through every step needed to make these mouth-watering buns at home, ensuring that you can impress your loved ones with your baking skills. So, roll up your sleeves – let’s get started!
Gather and prepare all ingredients
Before diving into dough-making, it’s essential to have everything prepped and ready to go. Here’s what you’ll need for the Danish Carnival Buns:
- For the dough:
- 4 cups all-purpose flour
- 1/4 cup granulated sugar
- 2 teaspoons active dry yeast
- 1/2 teaspoon salt
- 1 cup warm milk
- 1/2 cup unsalted butter, melted
- 2 large eggs
- For the cheesecake filling:
- 8 oz cream cheese, softened
- 1/4 cup powdered sugar
- 1 teaspoon vanilla extract
- 1 egg yolk
- For the blueberry compote:
- 2 cups fresh or frozen blueberries
- 1/2 cup granulated sugar
- 1 tablespoon lemon juice
- For the crumble topping:
- 1 cup all-purpose flour
- 1/2 cup brown sugar
- 1/4 cup cold butter, diced
Create the dough
In a large mixing bowl, combine the warm milk with the active dry yeast and let it sit for about five minutes. This bloom action kickstarts the yeast, essential for fluffy buns. Once it’s frothy, mix in the melted butter and eggs. Gradually add the flour, sugar, and salt, stirring until a shaggy dough forms. Don’t worry if it looks a bit messy; that’s just part of the process!
Knead until smooth and elastic
Time to channel your inner baker! Lightly flour a clean surface and turn the dough out. Knead it by folding and pressing for about 8–10 minutes until it becomes smooth and elastic. This step is crucial as it develops the gluten, creating a fluffy texture. You can always listen to some upbeat tunes to keep the energy up while kneading!
Allow the dough to rise
Once the dough is ready, form it into a ball and place it in a greased bowl, covering it with a damp cloth. Let it rise in a warm, draft-free area for about 1-2 hours, or until it has doubled in size. Pro tip: if your kitchen is cold, placing the bowl in a slightly warmed oven can help speed things up.
Prepare the cheesecake filling
While your dough rises, it’s time to whip up the creamy cheesecake filling. In a bowl, beat together the softened cream cheese, powdered sugar, vanilla extract, and egg yolk until smooth and creamy. This filling is what will add that delightful richness to your buns.
Make the blueberry compote
For a fruity finish, make your blueberry compote. In a saucepan, combine the blueberries, granulated sugar, and lemon juice. Cook over medium heat until the mixture thickens (about 10 minutes). Stir frequently to prevent sticking, and don’t forget to taste it – you might want to add a pinch more sugar or lemon juice for balance!
Create the crumble topping
Let’s add some crunch! In a bowl, mix the flour and brown sugar, then incorporate the cold butter using your fingers or a pastry cutter until it resembles coarse crumbs. Set this aside for later; it’s going to provide a delightful texture to your Danish Carnival Buns.
Shape the dough into buns
Once your dough has risen, punch it down gently to release the air. On a floured surface, roll it out into a rectangle about 1/2 inch thick. Cut the dough into squares, which will be your buns.
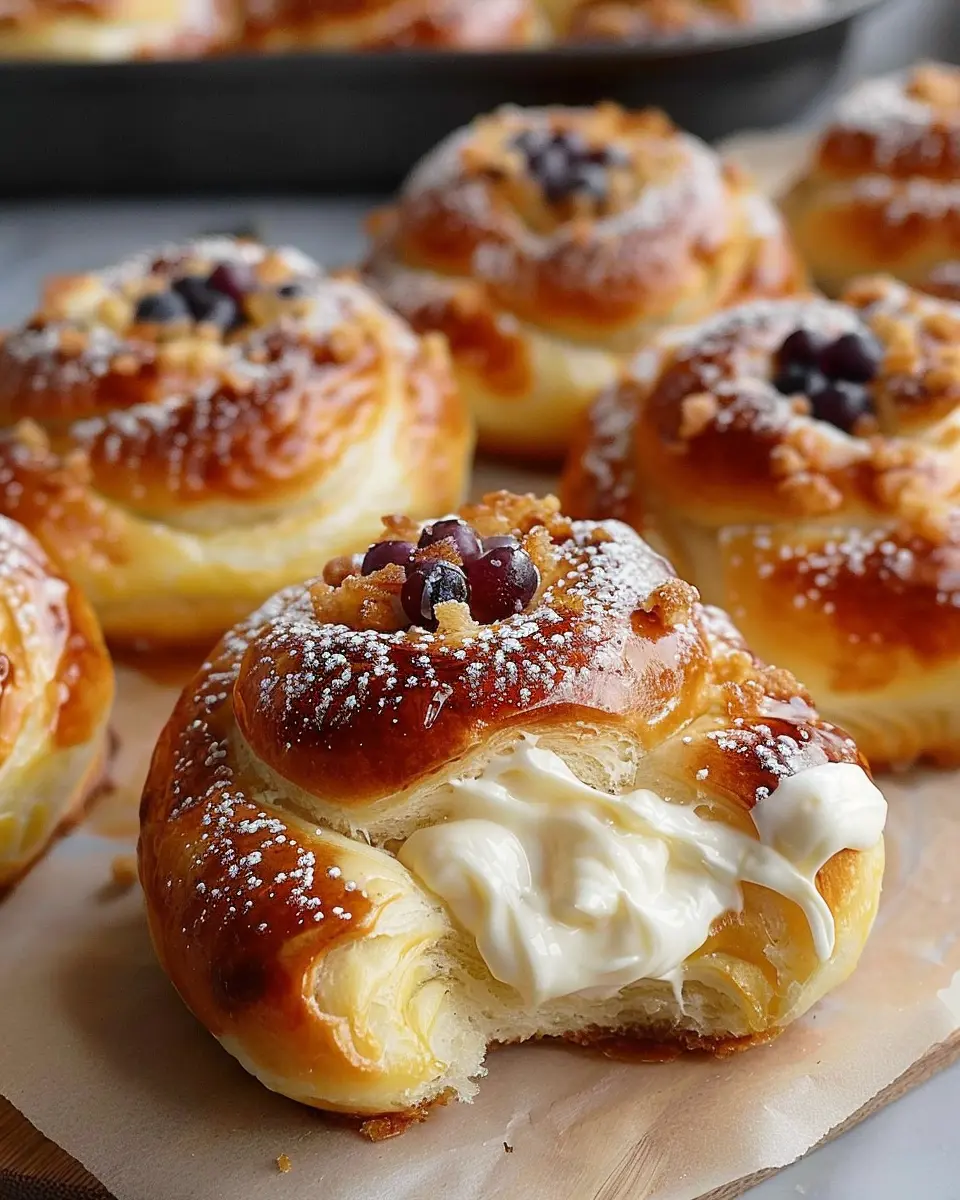
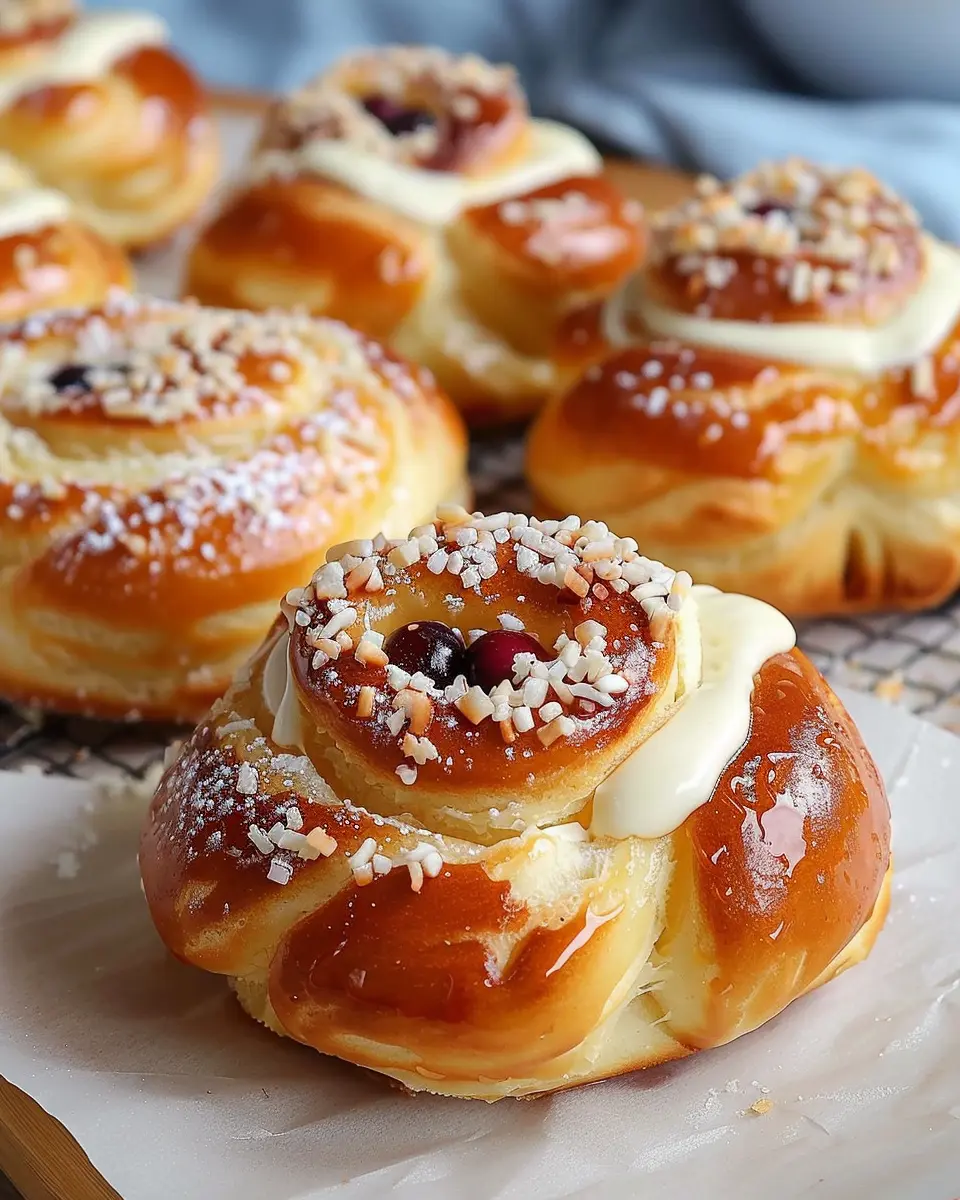
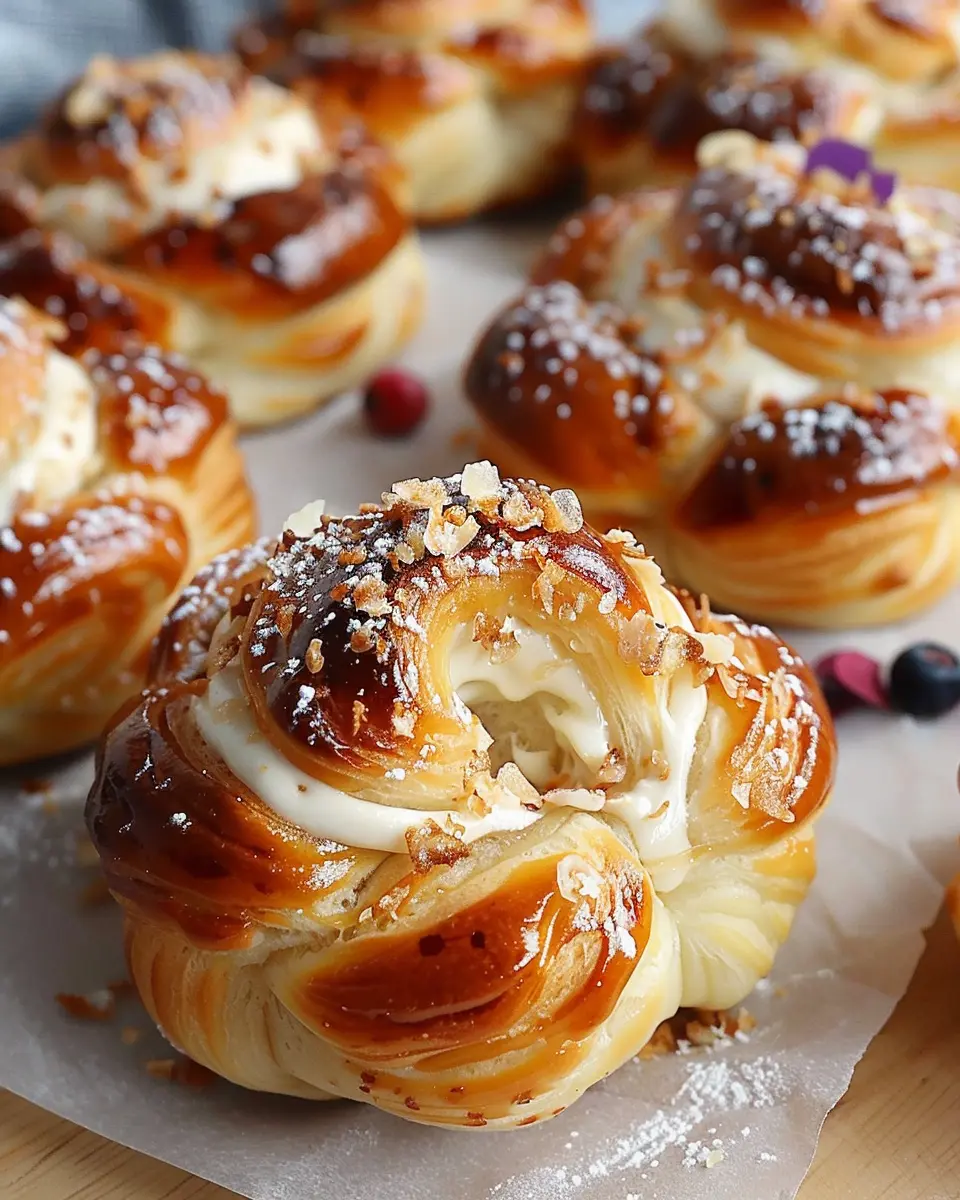
Assemble the buns with filling and compote
Place a generous teaspoon of the cheesecake filling in the center of each dough square, followed by a teaspoon of blueberry compote. Fold over the corners and pinch them to seal. Place the buns seam-side down on a baking sheet lined with parchment paper.
Bake to golden perfection
Preheat your oven to 375°F (190°C). After allowing the buns to rise again for about 30 minutes, sprinkle them with the crumble topping. Bake for 20-25 minutes or until they’re golden brown and glorious!
And there you have it—the irresistible Danish Carnival Buns ready to enjoy! Serve them warm, perhaps alongside a cup of tea or coffee, and your taste buds will thank you. Happy baking!

Variations of Danish Carnival Buns
Danish Carnival Buns are the perfect treat to spruce up any celebration, and one of the best parts about creating them is their versatility! Whether you’re looking to infuse a bit of seasonal flavor or experiment with different fillings, here are some delightful options to consider.
Seasonal Fruit Options
Embrace the bounty of each season by incorporating fresh fruits into your Danish Carnival Buns. Depending on the time of year, you can elevate your buns with:
- Spring: Strawberries or rhubarb lend a sweet yet tart flavor, making your buns feel light and refreshing.
- Summer: Opt for blueberries or peaches for a juicy, succulent twist that adds a splash of color.
- Fall: Apples and pears are perfect for a comforting, spiced version that warms the heart.
- Winter: Citrus fruits like oranges or grapefruits can brighten up dreary days with their vibrant zest.
If you want to learn more about the nutritional benefits of seasonal fruits, check out this resource.
Alternative Cream Fillings
What’s a Danish carnival bun without an indulgent filling? While the classic vanilla cheesecake is heavenly, you can also explore:
- Chocolate Cream Cheese: For those with a sweet tooth, this filling offers a rich and decadent experience.
- Lemon Curd: A tangy option that balances sweetness beautifully, making it a refreshing choice.
- Maple Pecan: If you enjoy a nutty finish, this filling combines creamy texture with delightful crunch.
Choosing different fillings not only keeps things interesting but also allows you to cater to your guests’ preferences. Remember, the fun of making Danish Carnival Buns lies in the creativity and personalization you bring to the table!
By experimenting with these variations, you can create a range of delectable buns that cater to every palate and season. Enjoy the process, and don’t hesitate to get your friends involved!
Cooking Tips and Notes for Danish Carnival Buns
Common pitfalls to avoid
When making Danish Carnival Buns, it’s easy to overlook a few crucial details. One common mistake is not letting the dough rise properly. Be patient; a good rise helps achieve that fluffy texture we all love. Also, don’t overfill your buns with the cheesecake mixture—aim for a tablespoon of filling per bun to avoid mess during baking. Lastly, keep an eye on the baking time; overly brown buns can happen quickly, so check them a few minutes before the timer goes off.
Storage tips to keep them fresh
To keep your delectable Danish Carnival Buns fresh, store them in an airtight container at room temperature. They can last for about two days this way. If you want to keep them longer, consider freezing them: wrap each bun tightly in plastic wrap and place them in a freezer-safe bag. To enjoy later, simply thaw them at room temperature and pop them into a warm oven for a few minutes. For more tips on perfect baked goods, check out resources from King Arthur Baking!
Immerse yourself in this delightful baking adventure!
Serving Suggestions for Danish Carnival Buns
Perfect Pairings with Beverages
When serving your Danish Carnival Buns, consider complementing them with delightful beverages that can enhance their flavors. A rich cup of freshly brewed coffee or a frothy cappuccino makes for an excellent pairing; the bitterness of the coffee beautifully contrasts the sweetness of the buns. Alternatively, a refreshing herbal tea, like chamomile or peppermint, can provide a soothing balance. For a non-caffeinated option, try a fruity punch made with berries and sparkling water—perfect for gatherings and sure to please your guests!
Creative Serving Styles for Gatherings
Elevate your serving style by presenting your Danish Carnival Buns on an attractive platter alongside various toppings. Think whipped cream, fresh berries, or even dollops of Greek yogurt for a scrumptious and interactive experience! Arrange them on a tiered cake stand for that extra charm, making them the centerpiece of your dessert table.
Don’t forget to include a little sign that describes what makes your Danish buns special—this can spark conversation! For more inspiration on gathering themes, check out resources like The Spruce Eats.
With these simple suggestions, your Danish Carnival Buns will not just be a treat, but a memorable part of your gatherings!
Time Breakdown for Danish Carnival Buns
When making Danish Carnival Buns, it’s essential to plan your time wisely to ensure everything runs smoothly from start to finish. Below is a handy breakdown to help you stay on track.
Preparation Time
Getting started takes approximately 20 to 30 minutes. This includes gathering your ingredients, mixing the dough, and prepping your vanilla cheesecake filling. You’ll want to make sure everything is ready to go, as this makes the process more enjoyable!
Rising and Baking Time
Let your dough rise for about 1 to 1.5 hours. This is the time during which the yeast works its magic! After that, baking will take around 15 to 20 minutes. The golden-brown glow of your Danish Carnival Buns will be tantalizing.
Total Time from Start to Finish
In total, plan for around 2 to 2.5 hours to create these delightful buns. With a little patience and love, you’ll be rewarded with a delicious treat that’s perfect for any occasion. Enjoy every bite!
If you’re looking for tips on mastering dough rising, check out this expert guide. Happy baking!
Nutritional Facts for Danish Carnival Buns
Calories and Serving Size
When you’re indulging in Danish Carnival Buns, it’s natural to be curious about what you’re consuming. Each bun typically contains around 250-300 calories, making it a delightful treat without overwhelming your daily intake. The recommended serving size is one bun, perfect for satisfying your sweet tooth while enjoying this delicious dessert.
Key Nutrients to Note
While Danish Carnival Buns are undeniably a treat, they do boast some nutritional elements worth considering:
- Carbohydrates: Providing energy, carbs are essential, especially for those with an active lifestyle.
- Protein: Each bun has a modest amount of protein, helping to balance out your meal.
- Fats: The buttery goodness adds rich flavor but keeps an eye on the portion.
As always, if you’re looking for healthy tips, websites like the USDA’s FoodData Central can be an excellent resource for understanding food compositions. Remember, moderation is key when enjoying these delectable buns!
FAQ about Danish Carnival Buns
Can I make these buns ahead of time?
Absolutely! You can prepare your Danish Carnival Buns the day before your event. Simply follow the recipe up until the baking step, then cover the unbaked buns tightly with plastic wrap and keep them in the refrigerator overnight. When you’re ready to bake them, let them come to room temperature for about 30 minutes before popping them in the oven. This way, you’ll save time and still enjoy fresh, warm buns!
What if I don’t have fresh blueberries?
Fresh blueberries can elevate your Danish Carnival Buns, but if they’re not available, don’t fret! You can substitute with frozen blueberries, just be sure to allow them to thaw and drain any excess moisture. Alternatively, other fruits like raspberries, strawberries, or even a mix of dried fruits can lend delightful flavors. The choice is yours; get creative! For more ideas on fruit substitutions, check out this guide on fruit alternatives.
How can I modify the recipe for dietary restrictions?
Modifying your Danish Carnival Buns to accommodate dietary restrictions is easier than you might think! For a gluten-free option, consider using a gluten-free all-purpose flour blend. If you’re looking to make them dairy-free, you can substitute regular cream cheese with a plant-based cream cheese alternative. Those on a vegan diet can explore egg substitutes like flax eggs. Just remember that each swap may alter the texture a bit, so experiment to find your perfect mix!
Feel free to share any of your unique alterations or experiences in the comments; we love learning from one another!
Conclusion on Danish Carnival Buns
The joy of homemade treats
Diving into the world of Danish Carnival Buns is more than just a culinary adventure; it’s about creating cherished memories in your kitchen. The thrill of crafting these delightful treats from scratch adds an extra layer of enjoyment to your baking experience. As you mix the dough and savor the sweet aroma wafting through your home, you’ll find that the joy of homemade treats stems from their ability to bring loved ones together.
Embrace the creativity that comes with these buns—experiment with flavors and fillings, and don’t hesitate to make them your own. Whether it’s for a festive gathering or a cozy evening treat, your homemade Danish Carnival Buns will undoubtedly become a favorite. Share your creations, relish the feedback, and celebrate the art of baking. Happy baking!
For more insights into Danish cuisine, check out Denmark’s Culinary Traditions for inspiration.
PrintDanish Carnival Buns: Indulgent Vanilla Cheesecake Delight Recipe
Danish Carnival Buns with Vanilla Cheesecake Delight are a sweet treat perfect for any celebration. These buns are fluffy and filled with a creamy vanilla cheesecake, making them an indulgent dessert.
- Prep Time: 20 minutes
- Cook Time: 25 minutes
- Total Time: 1 hour 45 minutes
- Yield: 12 buns
- Category: Dessert
- Method: Baking
- Cuisine: Danish
- Diet: Vegetarian
Ingredients
- 2 cups all-purpose flour
- 1/2 cup sugar
- 1 packet active dry yeast
- 1/2 cup milk
- 1/4 cup butter, softened
- 1 egg
- 1 cup cream cheese
- 1/4 cup powdered sugar
- 1 teaspoon vanilla extract
- 1 egg yolk (for egg wash)
Instructions
- Preheat the oven to 375°F (190°C).
- In a mixing bowl, combine warm milk, sugar, and yeast. Let it sit for 5 minutes until frothy.
- Mix in flour, softened butter, and egg until a dough forms. Knead until smooth.
- Let the dough rise in a warm place for 1 hour.
- Prepare the cheesecake filling by mixing cream cheese, powdered sugar, and vanilla extract.
- Roll out the dough, cut into circles, place a dollop of filling on each, then fold the dough over and seal.
- Place buns on a baking sheet, brush with egg wash, and bake for 20-25 minutes.
- Let cool before serving.
Notes
- For a sweeter bun, add more sugar to the dough.
- These buns can be served warm or at room temperature.
Nutrition
- Serving Size: 1 bun
- Calories: 250
- Sugar: 12g
- Sodium: 150mg
- Fat: 10g
- Saturated Fat: 5g
- Unsaturated Fat: 3g
- Trans Fat: 0g
- Carbohydrates: 30g
- Fiber: 1g
- Protein: 4g
- Cholesterol: 30mg